Gluten-free Bread 2025
I first posted this recipe in 2023 so that I could share with friends and people out there on the internets. I’ve continued to make this bread – weekly – since then, and I’ve tweaked a few things and also picked up some new techniques since then. I think the version I’m making now is quite a bit better than I was making in 2023, so here’s the new recipe.
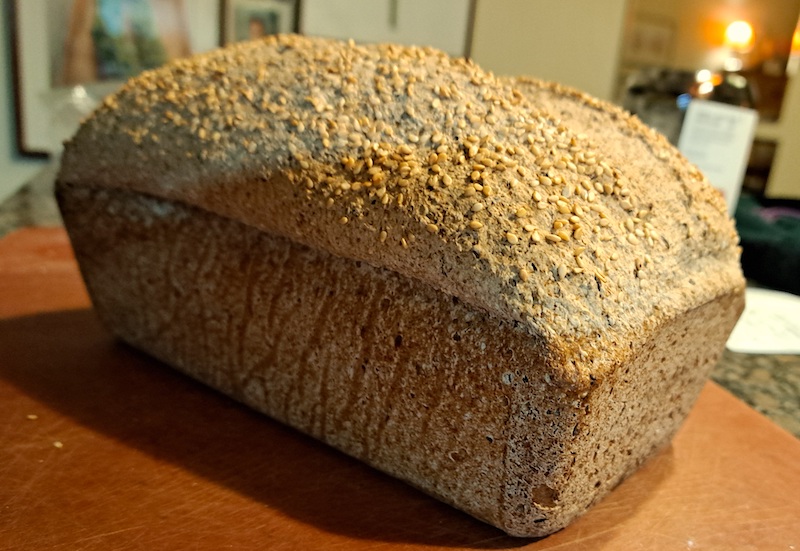
Some significant changes from before:
-
Instead of buckwheat and oats in equal parts, I’m now using only buckwheat, as my wife eventually learned she reacted to oats. The difference in the bread is minimal. Short of a real-time side-by-side test I can’t tell the difference. So I’m leaving both in this recipe, but you can vary the mix as you like.
-
Powdered psyllium husk. My local grocery (Famous Foods, in Vancouver) started stocking this. It makes a difference over the regular coarse stuff… and it’s finer than I can make by grinding the regular stuff in my processor. If you can get the powdered stuff, do so, because it makes the consistency of the mix much more dough-like.
-
Put a pan with water on the bottom rack of the oven to make steam in the oven: this is an old, old bread-making tip, and it really does make a big difference. Without it, there’s no “oven spring,” but with it, I’m getting an extra inch of height at least.
Here’s my updated recipe:
On ingredients and mechanics:
This is a mix of four grains: I generally buy oats and buckwheat whole (or at least “steel cut”) and reduce them to flour in my blender/grinder. The tapioca and sorghum I buy as flour. If oats aren’t tolerable (as in my household) then double the buckwheat portion; it isn’t really a noticeable change.
Psyllium husk makes this bread work; instead of something like xanthum gum, taking the place of gluten in holding the dough together so that it rises. Psyllium husk comes in coarse and powdered forms; and the finer powder works much better, because it soaks up much more water; and it hydrates much quicker – almost instantly, giving you a less messy batter, more dough-like. If you can’t buy the powdered form, you can powder it yourself: whiz the coarse husk in your grinder or food processor, but I can’t get it quite as fine as the powdered husk I can buy. There is also a bit of baking powder in this recipe, mostly for superstitious reasons; I use it because one of the original recipes I followed said “it needs all the help it can get.” Last, the vinegar actually does make a difference to the rise; I was skeptical at first, but it does.
As with wheat dough, the trick is to get the dough as wet as possible but not too wet. This wants to be on the boundary between batter and dough. You’re probably not going to knead it, so it doesn’t have to be very handle-able; so make it plenty wet. If the dough is too stiff, it won’t rise well. But if it is too wet, it’ll ooze over the edges of the loaf pan and that part will bake hard and brown. Over time, I’ve come to 750ml as the right amount of water for this recipe.
This bread is going to be better as toast than as plain bread, at least after the first day. But this is vastly better than the stuff you can buy in the supermarket. It makes absolutely delicious toast. It retains a whole lot of moisture, so I usually toast it gently if I’m using it for a sandwich.
Mise en place
A big mixing bowl, kitchen scale, grinder or food processor, whisk, dough whisk or wooden spoon, measuring spoons, measuring cups, 9-inch by 5-inch loaf pan, parchment paper. A baking sheet with a rim on the bottom oven rack, and if you have one, a pizza stone on the middle rack.
Ingredients and process
Preheat your oven to 410°.
In a big mixing bowl, whisk these together:
- 210g oat flour and buckwheat flour, in whatever proportions you like
- 50g flaxseed, whole (optional)
Add the following, and whisk them in until completely blended:
- 4Tbsp (~25g) powdered psyllium husk
- 4tsp fine salt
- 1.5tsp baking powder
Now whisk in the lighter flours, taking care not to make a dust cloud:
- 170g tapioca flour
- 210g sorghum flour
Draw 750ml of hot tap water.
In a small cup, blend
- 1Tbsp sugar
- 3/4 Tbsp yeast
…add a bit of the hot tap water and leave it for a few minutes to begin foaming.
Add the foaming yeast to the flour, followed by the remainder of the warm water, followed by:
- 1Tbsp apple cider vinegar
- 2Tbsp oil
With a heavy fork or spoon (I use a Danish dough whisk. I suppose you could use a machine to do this, or your bare hands) mix that all together really well, until it binds together and starts to come away from the bowl: at least a couple minutes of mixing/beating. As the psyllium absorbs water, the dough will quickly start to stiffen up. Beat it until your arm is tired! Then cover and let it rest in the bowl for about 10 minutes for the dough to fully hydrate and the rise to begin.
Line a 9x5 loaf pan with baking parchment (or don’t, see if I care), and transfer (ooze? drop?) the dough into the pan. With a wet spatula, smooth out the top, but without pressing the dough too much – don’t squish the air out. At this point I cover the damp top with sesame seeds and gently press them in so they don’t fall off.
Cover it with a tea towel and let it rise in a warm place (on top of the oven?) for 20-25 minutes. It won’t rise much more than it does in that time, or at least it won’t hold beyond that, so there’s no point in a long rise, unless you’re in a cooler place than I’m working in.
Put the loaf pan in the oven (middle rack, on a stone if you have one) and pour 1 cup of warm water into the preheated baking sheet on the bottom rack – this will instantly make steam. Close the door quick!
Bake at 410° for 20 minutes, and then turn it down to 375° for about 1 hour and 45 minutes more. Your oven, your mileage may vary.
Remove the loaf from the pan and let cool completely on a wire rack. Don’t slice it until it’s cool!
This keeps for 5 days at least. I store it in a plastic bag in the cupboard.